
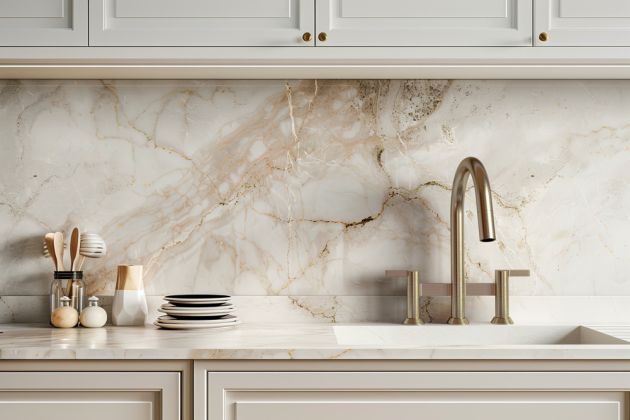
When comparing luxury cooking appliances and prep zones, the choice between workstation and undermount sinks revolves around the adjustments needed in sink cabinetry, the overall weight of the sink and its contents, and the space available for plumbing under the sink. Insufficient structural support may result in the fracturing of a solid surface countertop.
The choice of sink has a direct impact on cabinet width, internal framing supports, cutouts in the countertop, elevation of the drain, and the storage space remaining. The large workstation sink models create the largest impact on cabinet structure due to the heavy operating weight of the sink, water, cooking vessels, cutting boards, accessories, and waste disposal.
Luxury kitchens require integration of the sink with luxury cooking appliances, custom storage systems, and stone surfaces. When the cabinetmaker, countertop and sink fabricators, plumber, and kitchen designer work together from the beginning, a functional prep area is created without any weak stone sections, limited space for plumbing, and expensive modifications needed during the installation.
Defining the Typologies: Ergonomic Workstations vs. Traditional Basins
The main difference between workstation sinks vs undermount sinks is in their design and daily use. A traditional single-bowl undermount sink has one large open basin. A workstation sink has added integrated ledges that support fitted preparation accessories.
Standard Undermount Basins
An undermount sink is installed underneath a solid-surface countertop, such as stone or an engineered surface. Undermount sinks have their rims below the countertop, providing a clean line and allowing users to wipe food and waste directly into the sink.
Most single-bowl undermount sinks are approximately 24 to 36 inches in width and 8 to 10 inches in depth. Measurements for the cabinet space will vary based on the sink rim, mounting clips, and bowl profile, as well as the manufacturer’s required side clearances.
Support for an undermount sink is provided by mechanical clips or brackets, while the rest is sealed with structural adhesive or silicone. Undermount sinks are useful in designs where the primary goal is to have a smooth transition from sink to countertop and where a seamless washing area is desirable.
It also supports refined built-in kitchen aesthetics through flush or carefully controlled positive, negative, or zero countertop reveals.
Multi-Level Workstation Sinks
A workstation sink is actually a complete prep sink system that incorporates all the tools and accessories needed for sink and countertop work. The workstation sink includes everything from cutting boards and drying racks to colanders, serving boards, and other fitted tools. You can perform all tasks, including cutting, drying, and serving, without leaving the workspace.
Large, multi-tier kitchen sinks typically have two to three functional levels. Because each level has a formed ledge, these sinks have greater vertical depth and a higher level of precision manufacturing compared to standard undermount sinks.
Workstations typically start around 36 inches and can go up to 60 inches or even more. For example, a 5-foot workstation can have an outer width of 57 ½ inches and a basin depth of approximately 10 ¾ inches, with a defined minimum of 60 inches of inner cabinet space.
These sinks have the potential to transform a kitchen island into a preparation, washing, plating, and serving center. Conversely, their large size and fully loaded weight mean they require supplemental structural support beyond the stone countertop.
Load Dynamics: Executing Structural Cabinet Framing Adjustments
A large workstation puts an uneven load on a cabinet. When installing, an installer needs to keep in mind an empty sink, water, cookware, fitted boards, accessories, food, and any sink disposal units below the drain.
Each US gallon of water weighs roughly 8.34 pounds. This means 15 gallons of water is approximately 125 pounds, and 20 gallons is about 167 pounds. This is all before considering the weight of the sink, disposal, boards, cookware, and food.
Workstations that are 45 to 60 inches in length are designed to take on loads of up to 300 pounds. Therefore, the support system should be designed to support the heaviest expected load rather than the empty weight of the sink.
Why Stone Should Not Carry the Full Load
Evenly distributed compression is not an issue for granite or quartz. However, thin sink rails, corners, and cutout transitions are areas where both materials can break. A large opening removes material from one of the countertop’s most heavily used zones.
Using just adhesive and standard clips to support a workstation transfers a significant downward load to the cut-out edge. This can also cause issues for the surrounding area, including stress on faucet holes, countertop seams, and areas of narrow stone at the front and back of the basin.
Building the Internal Support Frame
Cabinet framing adjustments involve either attaching hardwood ledger boards to the sides of cabinets or integrating a robust steel support frame within the cabinet structure. The basin flange rests directly on this frame.
Large workstation sinks typically need wood cleats for support instead of the typical mounting clips. Depending on the size of the sink and the layout of the cabinet, installers typically use either ¾-by-5½-inch hardwood boards or ¾-by-3-inch boards when they need more space for undercounter equipment.
The support must be level in all directions. Each flange of the sink should rest on the support so that the load is transferred to the cabinet side walls instead of being concentrated at a few points.
Structural Cabinetry Layout Profile
[Standard Undermount Cutout] → Countertop Core Material → Structural Adhesive Bead → Rim of Basin (Suspended by Clips)
[Reinforced Workstation Box] → Custom 2×4 Side Ledger Boards → Cabinet Side Wall Frame → Direct Mechanical Underside Support Base
The final ledger size must comply with the sink manufacturer’s specifications and the requirements of the cabinet engineer. A nominal 2×4 is almost 1½ by 3½ inches, so the contractor must verify whether that thickness leaves enough room for the faucet, drain, disposal, and water equipment.
Cabinet Wall Strength
Ledger boards only work when the cabinet walls can support the load. Thin cabinet materials like particleboard, melamine, or thermofused finishes may require additional support like plywood or steel brackets.
Fasteners should directly affix to the structural material of the cabinets, not the veneer. If the sink cabinet is part of a long run, it may be necessary to attach the sink cabinet to the adjacent cabinet boxes and the floor to limit the cabinet’s movement.
Hydraulic Realities: Managing Lowered Plumbing Clearances
Accessory ledges surround the upper basin and occupy vertical space. To retain useful bowl capacity, manufacturers typically have to extend the lowest point of the bowl deeper into the cabinet.
This deeper design impacts the plumbing clearances. The strainer, disposal, and trap inlet, along with the waste connection and the horizontal connection, should be positioned 2 to 4 inches lower compared to the space with a shallower undermount basin.
Waste Outlet and P-Trap Position
The wall drain must be lower than the disposal discharge or sink tailpiece, though the trap arm must angle to the sanitary connection. Elevating the waste to fit a wall drain outlet leads to an inefficient drainage system and must be avoided as it can cause waste to remain stagnant in the pipes.
In a new build, the height of the sink must be determined by first calculating the finished height of the countertop and then, from there, calculating the height of the countertop, sink, drain fitting, disposal, P-trap, pipe slope, and the elevation of the sanitary tee.
Choosing a height for a fixed wall drain requires more than just a general guideline. Since there are variations in sinks and disposals, a licensed plumber should verify the final height based on the product specification sheets before the wall is closed.
Garbage Disposal Space
Continuous-feed disposals increase the depth and weight of a workstation. With the deep sink, a workstation’s disposal discharge might be too low to connect to the wall drain.
The disposal can also cause problems with storage by interfering with drawers, pullout waste containers, water filters, hot water dispensers, and reverse osmosis systems.
If the sink has a drain opening that does not require a drain offset, then moving the drain to the side may help save space in the cabinet.
Faucet and Supply-Line Access
Frames for workstation support can occupy the space traditionally used for faucet shank and supply hose installations. However, the installer must maintain adequate space behind the frame to allow tightening of faucet hardware and service access to shutoff valves.
Instead of standard mounting clips, large workstation sinks usually demand a wood cleat support system. For example, installers might use ¾-by-5½-inch hardwood boards or ¾-by-3-inch boards if they need more space for plumbing and disposals or other equipment.
Technical Specifications Matrix: Spatial and Structural Tolerances
The figures below show a contractor planning checklist. When it comes to product specifications, it is the most important concern. This concern arises because different product models can have different rim dimensions, drain locations, and different mounting systems.
Structural Attribute |
Standard Undermount Basin |
Multi-Tier Workstation Sink |
| Typical sink width | 24–36 inches | 36–60+ inches |
| Typical bowl depth | 8–10 inches | 10–12 inches |
| Common minimum cabinet width | Sink width plus approximately 3 inches | Commonly sink width plus 2½–3 inches |
| Example countertop cutout | Model-specific template, often about 1 inch smaller than rim dimensions | 56 inches wide by 18 inches for a 57½-inch Galley workstation example |
| Support method | Adhesive seal plus mechanical clips or brackets | Hardwood ledgers or a steel support frame |
| Planning load | Verify sink and countertop manufacturer limits | Design for a loaded condition that can exceed 300 pounds |
| Water weight | 8.34 pounds per gallon | 8.34 pounds per gallon |
| Cabinet interior depth | Common 24-inch base cabinet, model dependent | At least 22½ inches clear for certain Galley sink-and-tap installations |
| Space behind support frame | Determined by clips, faucet, and bowl shape | At least 2¾ inches for the referenced Galley installation |
| Garbage disposal position | Standard drop with more usable space below | Commonly 2–4 inches lower inside the cabinet |
| Basin-bottom elevation with a 36-inch counter | About 26–28 inches above finished floor for an 8–10-inch bowl | About 24–26 inches above finished floor for a 10–12-inch bowl |
| Wall drain rough-in | Must remain below the tailpiece or disposal outlet | Often needs a lower project-specific rough-in |
| Standard kitchen trap size | Commonly 1½ inches, subject to local code | Commonly 1½ inches, subject to local code |
| Countertop reveal | Positive, negative, or zero reveal | Commonly zero reveal for smooth accessory movement |
| Under-sink storage | Usually allows filtration and pullouts | Frequently reduced by bowl depth and framing |
Frequently Asked Questions
Do large workstation sinks require a non-standard custom cabinet base size?
Big workstation sinks usually need big cabinet boxes. Sometimes they need multiple joined boxes. For example, a 57½-inch workstation sink may need a minimum of a 60-inch cabinet. Some cabinet dividers may need to be cut based on the manufacturer’s specifications.
How does the depth of a workstation sink affect the rough-in wall drain height?
A deeper workstation sink reduces the height of the drain fitting, disposal, and p-trap assembly by approximately 2 to 4 inches. The plumber should lower the wall drain to ensure a proper connection that allows the disposal to drain by gravity.
Can an existing undermount sink be replaced with a workstation sink without replacing the countertop?
This is only possible if the new sink’s rim, cutout, reveal, cabinet width, and drain location align with the current setup. Generally, using a larger workstation means recutting the countertop, providing new cabinet supports, repositioning plumbing, and some stone cutouts cannot be safely enlarged on site.
Precision Mitigations: Preventing Water Intrusions and Structural Sagging
A workstation installation can fail because of movement, water penetration, excessive waste disposal, or insufficient load transfer. Initially, these problems manifest as small gaps or slight movements in the cabinets, but become more pronounced and more severe with continued use.
Isolate the Sink Load from the Stone
The support frame should bear the completely loaded weight of the basin. The countertop should seal the rim and provide the finished surface. However, it should not act as the workstation’s primary structural support.
The correct load path is:
Loaded Basin → Basin Flanges → Level Hardwood or Steel Frame → Reinforced Cabinet Walls → Cabinet Base and Floor
This load path helps protect the stone cutout from the weight of water, cookware, accessories, and disposal equipment. It also reduces movement at countertop seams and narrow rails.
Control Disposal Stress
A continuous-feed disposal creates a heavy point load at the drain opening. An assemblage mounting the disposal that is tight does not strengthen the sink and may in fact distort thin stainless steel or add stress to the junction of the basin and the countertop.
The disposal should be mounted within the torque limitations specified by the manufacturer. If the sink or cabinet makers specify increased support, the weight of the disposal should be transferred to the cabinet base by an independent support system, which should not restrict the isolation of the disposal or service access.
Protect the Rim from Water
Before applying the sealant, ensure the basin flange and countertop underside are clean and dry. The sealant should be a continuous bead of silicone as per the manufacturer’s specifications, as this will keep water out of the cabinet and off the support ledgers.
Moisture may penetrate and become trapped between the cabinet and countertop if left unchecked. Using sealed hardwood, exterior-grade plywood, corrosion-resistant brackets, and properly finished cabinet edges can provide more prolonged protection.
Verify the Installation Before Countertop Setting
Before permanently setting a countertop to a cabinet, the sink should be installed, checked, properly supported, and squared against the template. At this time, the installer should also verify faucet access, disposal clearance, and alignment of traps and equipment, as well as the position of shut-off valves and the clearance available in the cabinet.
All countertop drawings must be shared among the countertop fabricator, cabinet installer, plumber, and appliance planner. This enables the countertop fabricator to plan cutouts, prevents stone rails from being weakened, prevents fittings from being obstructed, and prevents unnecessary revisits to the site for reinstalling cabinets.
Engineer Your Culinary Space with the Architecture Experts at Universal Appliance and Kitchen Center
A workstation sink is not just a sink; it is a structural and mechanical element of a design. As a design element, sinks need to be evaluated for width, ledge systems, sink supports, drainage disposal methods, and sink drains. All of these need to be confirmed before cabinetry enters production.
Universal Appliance and Kitchen Center’s custom design team assists homeowners, builders, architects, and interior designers in aligning sink specifications with cabinetry, stone, plumbing prep, storage systems, and professional culinary systems. This review helps create an efficient preparation area while maintaining access to services and the structural integrity of the cabinets.
Before cutting and finalizing the design of the kitchen, consulting with Universal Appliance and Kitchen Center’s corporate design specialists can be beneficial for homeowners who want a luxury and operational workstation in their kitchen. Be sure to take all pertinent information, including the sink’s spec sheet, disposal, cabinetry design, countertop design, and plumbing design, so that the layout can be verified prior to ordering the materials.