What is the Best Way to Clean an Electric Cooktop?

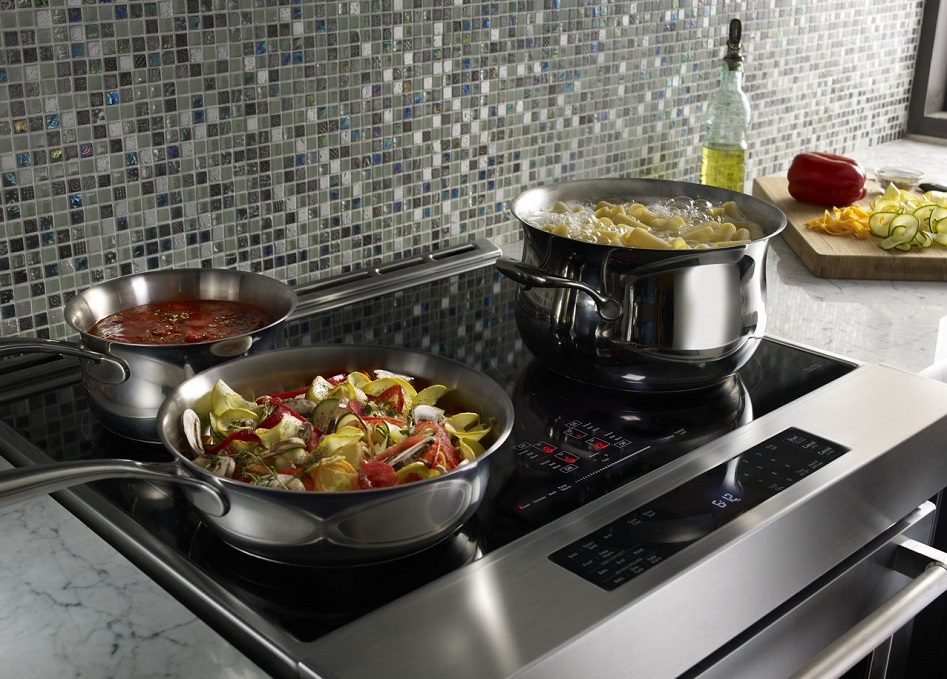
An electric cooktop is an attractive option for many people because it has a contemporary look, it’s simple to use, and easy to clean. But, for people that have previously used a gas stovetop, it can be a culture shock to be presented with a smooth cooktop surface. There are no gas burners to clean and it can be difficult to understand how to clean it properly. If you have a new electric stovetop or you’ve inherited one in your new home, this brief guide will help you to clean it efficiently.

Understanding the Differences

Before we begin, let’s take a look at some of the key differences that you need to understand when you approach this cleaning task. First, there is no need to search for chunks of burnt food debris that may be lodged in the gas burners.

Second, on most days you won’t need any kind of deep cleaning routine to keep your electric cooktop in great condition. A gentle daily scrub with some warm water and a kitchen sponge will go a long way to keep your stovetop clean, safe, and serviceable to use.

Lastly, at times you will want to give the stovetop a more comprehensive clean and scrub to restore some lost luster. This should be a weekly deeper cleaning process to remove any buildup of grease stains that may have occurred during cooking. This deeper cleaning is the focus of the remainder of our article.

Gather the Supplies

To clean your electric cooktop you will need the following supplies: a soft sponge, a ceramic scraper (this is optional), paper kitchen towels, a soft cloth, a glass cooktop cleaner, and warm soapy water.

Cleaning the Electric Cooktop

Before you begin make sure that the cooktop is completely cool to the touch to avoid burns and other injuries. To remove any loose debris use the sponge and warm water and wipe down the entire cooktop area as you would for lighter daily cleaning. When you’re done wipe the area with the dry soft cloth and kitchen towels until it’s fully dry.

Now it’s time to apply the cooktop cleaner, use a liberal amount, and gently scrub the surface with the kitchen sponge. The harsher scrubbing side of the sponge can be used to make circular movements to cover the cooktop with the glass cleaner. This takes a little time, there will be some areas that feel rougher to the touch than others. This indicates a buildup of grease that needs to be removed.

Those harder areas with a buildup of grease can be scraped clean with the ceramic scraping tool. These rougher areas need to be scraped and then scrubbed again with the cooktop cleaner. This should be followed with the sponge to clean the surface again and check for any remaining rough patches of grease. Go slowly, the ceramic scraper is designed to minimize scratching the glass but careless use can still cause visible damage. With repeated scrapings and wiping the glass stovetop surface should start to feel smoother as you rub the areas with the sponge.

The final stage is to remove the cleaner from the stovetop with the soft cloth or a few kitchen paper towels. When the surface is drier you can buff the glass surface with dry paper like you would when cleaning a window. With polishing, it’s possible to get the surface clean and shiny and you may be able to see your reflection in the glass.

If you’re thinking about a new electric cooktop for your kitchen, explore this online collection of cooktops or for additional help and guidance speak to a home appliance expert.

How to Choose the Correct Temperature for Your Refrigerator and Freezer

We chill and freeze foods to keep them fresh and healthier for longer, and the temperature that we choose can make all the difference. If food is stored at the wrong temperature, it can spoil quickly, and there is a real risk of disease to consider. A modern refrigerator and freezer can keep food safe for days or weeks because it slows the growth of bacteria. But, if the temperature rises too far, the bacteria will multiply at an exponential rate, and food poisoning becomes a risk. In this article, we take a closer look at the correct temperatures for health and efficient food storage.

A Refrigerator Temperature

According to the U.S. Food and Drug Administration (FDA), the optimal refrigerator temperature is at or under 40ºF. But, the optimal refrigerator temperature may be lower in the 35-38ºF range. Why? Well, this temperature is as close as you can get to the freezing point without the food actually freezing. If the refrigerator temperature is at 40ºF, the bacteria begin to multiply, and that is what we want to prevent.  When internal refrigerator temperatures climb above the aforementioned 35-38ºF range, the food can spoil quickly, and stomach upsets are more likely due to E.coli, Salmonella, and other microorganisms.

A Freezer Temperature

The FDA has stated that the ideal freezer temperature should be at or under 0ºF. The temperature should be kept as close to 0ºF as possible, and this is especially true when warm food is added to the freezer. Some freezers have a flash freeze feature that drops the temperature further for around 24 hours to prevent freezer burn on new items. This can be replicated manually if the temperature is dropped a few degrees for a few hours. But, this will drive up the energy bills, so it’s important to change the temperature back to 0ºF when you’re ready. If there is a significant buildup of ice inside the freezer, this is a sure sign that the temperature is too cold.

Taking Accurate Temperature Readings

Measuring the refrigerator and freezer temperatures accurately is important when you want to promote efficient food storage in your home. Modern appliances may come with a temperature gauge, but the accuracy can vary a great deal. It is possible to set the refrigerator to 37ºF, and the temperature gauge is reading it wrong. In fact, it’s pretty common for a refrigerator to be 1-3ºF off the temperature that you want. To remedy this problem, there is a simple solution if you add a separate refrigerator and freezer thermometer to double-check the temperature in each unit. These gauges are inexpensive and readily available, and they are a must for models that have no display temperature gauges installed.

How to Use a Separate Thermometer

The thermometer should be placed in the freezer, and another should be located in the freezer. They should be left in place for at least 20 minutes to take an accurate temperature reading. After this period, remove them and compare them to the built-in temperature gauge if you have one to see if they match. If they are close, you can make accurate adjustments using the basic 1-5 rated temperature dial until you achieve the optimal temperature. Make minor adjustments until you’re happy, and the refrigerator and freezer should be able to maintain that temperature. Regular checks are advisable, but if the appliance is working well, there should be no problems.

If you are considering a new refrigerator/freezer for your kitchen, you can explore your options with this online collection or contact a home appliance specialist for further help and guidance.

5 Tips to Keep the Kitchen Cool When Cooking

When summer arrives, we still want to eat tasty food, but cooking can be a real chore when you want to avoid extra heat in your home. One alternative is to exclusively eat cold foods and salads, but this is not an ideal solution for everyone. But, it is possible to cook comfortably when it’s hot outdoors with a little preparation. Here are five tips that will help you to keep cool in the kitchen while you cook meals over the hot summer months.

1.  Avoid Using the Oven

The oven generates a lot of heat in your kitchen and this will seem even more obvious when the weather is hot. Stick to foods that can be prepared without an oven and you will be more comfortable as you cook. As an alternative, fire up the grill or use a blender to make some tasty cold treats. Restrict your indoor cooking to the stovetop and choose recipes with shorter cooking times that use low to medium heat settings.

2.  Use a Slow Cooker

This is a very smart way to cook tasty foods without generating heat in your kitchen. The heat is well retained inside the appliance and you can front load a lot of the cooking experience. The automatic timer will turn off the cooking when it’s done and keep it warm until you return. So, you can go outdoors and enjoy the summer sun and your meal will be ready when you’re ready to eat.

3.  Use Portable Fans

Many people believe that fans don’t really cool a room because they simply move air around to improve circulation. There is some truth to that, but you can improve the cooling characteristics if the portable fan is placed near an open door or window. This is especially true if fresh air is drawn into the kitchen from a well shaded area. When you are cooking indoors and it’s hot outside, you will appreciate those few vital degrees of temperature difference. This is very helpful if you decide to cook after the sun sets to make the kitchen a little cooler.

4.  Close the Shades or Curtains

If your home has a lot of windows where sunlight can stream in, then you may need to close the shades or curtains to get some relief. Sunshine can heat up a room quickly and this is especially true if you’re cooking a meal in the kitchen. There is no need to cook with artificial light or in the dark and even partially drawing the shades can make a huge difference. Keeping out the excess heat generated by sunshine can reduce the temperatures naturally in your entire home.

5.  Cooking Outdoors

This is the most fun option on our entire list and this is why we’ve presented it last. Let’s face it, the best way to keep the kitchen cool is to avoid cooking in there when the weather is hot. Stick to cold food prep, making salads, dressings, and anything else that may generate heat is avoided. When we cook outdoors, foods tend to be tastier and you can stick to a shaded patio to keep cooler. Grilling is simple, but a more extensive outdoor kitchen can give you all the functionality that you need to cook elaborate meals. Adding a range, refrigerator, wine cooler, and other helpful appliances can take your outdoor kitchen to the next level for cooking and entertaining.

If you’re considering outdoor kitchen appliances, you can explore your options with our online collection or seek further guidance by speaking to a home appliance expert.

Is Overloading Your Fridge Such a Bad Idea?

As the holiday season approaches, many households tend to have more food in their home. When you’re struggling for space, you may ask yourself, is overloading the fridge or freezer such a bad thing? Here we’ll examine the consequences of overstocking your fridge and why you should avoid it in the future.

What Happens When You Overload Your Fridge?

Regardless of the size of your fridge, packing it to capacity can be bad for your food items and appliance. A good quality model can offer years of service, but if you don’t load it properly, you could find yourself with frequent repair issues within a couple of years.

There are a number of issues that can result from overloading your fridge that include:

  • Damage to food: The first thing you are likely to notice is that your food products tend to have a shorter lifespan. If your fridge is packed with too many items for a longer period, those containers and packets can compromise the air circulation inside the appliance. This can not only cause an increase in the fridge temperature, but it can also encourage bacterial growth, which can put you at risk of stomach upsets if you consume them.
  • Vent blockages: If you stuff your refrigerator shelves to the limit, you can block the vents that allow cold air to enter the unit. When the vents are blocked, the refrigerator motor and condenser will need to work harder for longer to maintain the desired temperature. This can lead to excessive wear and tear that could cause a burnout.
  • Reduced energy efficiency: This follows on from the previous points, but if the airflow is compromised and the components need to work harder, the energy used by the appliance will increase. This reduced energy efficiency could drive the cost of your energy bills up, since your fridge is running 24/7.

Tips to Maximize Fridge Space

If you are worried about overstocking your fridge, there are some tips that can help you to maximize your fridge space.

Adjust the Shelves:

Most refrigerator models have adjustable shelves that allow you to move the shelves up or down. Rather than sticking with the initial installation, have a look at what you need to store and adjust the shelves accordingly.

For example, instead of laying bottles down taking up a full shelf, increase the shelf height to stand them up. This could free up over half a shelf where you can stack other items.

Rotate Foods:

Before you load your new groceries into the fridge, pull the older items forward. This can be a good reminder of what you need to use now. Rotating your food can help inspire you for a leftovers meal that will clear some space.

Decant into Smaller Containers:

If you have used some food, leaving it in a large container can not only take up valuable space but can compromise the lifespan of the food item. Allowing excess air in a container exposes the food, which may reduce freshness. So, if you have opened a large container of cream cheese, yogurt, or other items, transfer it to a smaller tub to save space and maintain freshness.

Stack Like Items Together:

Many food containers are designed to be stacked to make attractive displays in grocery stores. So, you can make use of this in your refrigerator. By stacking items together you can save space and also keep track of what you have. It makes it easy to see that you have three or four containers, rather than needing to search the entire fridge to find what you have.

If your fridge is lacking space for your day to day requirements, it may be time for an upgrade. You can explore your options with our online refrigerator collection or speak to one of our team members for expert help and guidance.

4 Often Overlooked Microwave Oven Advantages

Microwave ovens have been a standard feature in many kitchens for decades. And yet, many people still don’t use them to their full potential and some features are misunderstood entirely. This is unfortunate, a microwave oven can be a real time saver when you’re cooking a meal for your family. The latest microwaves have new features that make them even more useful for any busy homemaker. In this article, we will take a closer look at four microwave advantages that are often overlooked.

1.  Convection Setting Options

If you’re unfamiliar with your new microwave or you have an older model, you may be unaware of the convection settings. This is a baking mode that is typically found on some mid-range or high-end ovens, ranges, and wall ovens. A convection setting heats the foods from the inside to the outside much like a standard microwave oven. But, the flavors are sealed in to make the food more delicious and less prone to drying out. This convection action is achieved with a rear mounted fan that circulates the heated air throughout the oven. The result is a more consistent temperature that’s ideal for even baking. Certain microwave ovens now have a convection setting to cook food and heat leftovers evenly. That means that you can reheat last night’s pizza without the soggy crust and getting the perfect mac and cheese results are only a couple of button clicks away.

2.  The Defrosting Features

Many people have used the defrosting feature on their microwave ovens. In fact, some people may only use this feature and some basic reheating on a regular basis. But, defrosting with the microwave is incredibly efficient because you can thaw a pound of meat, poultry, or fish in just a few minutes. There is no need for any pre-cooking and select models even have a “Quick Defrost” or “Auto Defrost” setting to make this process even faster. This can be a real help if you’re preparing a larger meal or cooking in bulk for the week ahead.

3.  Improved Energy Efficiency

There are times when you need to reheat leftovers or a smaller casserole before you bring it to the table. Placing these foods in a full sized oven with a lot of wasted space unnecessarily consumes a lot of energy. This will drive up your energy bills and this can be avoided if you use the microwave oven. A microwave is smaller than a full-size oven and a countertop model tends to range from 0.5 up to 2.2 cubic feet. But, due to their design, they can still have a larger interior capacity than your oven starting at around 2 cubic feet. When you pair these characteristics with the faster heating times, it’s easy to see how a microwave oven could significantly lower your energy costs.

4.  Alternative Configuration Options

When most people think of a microwave oven they imagine a countertop or wall mounted unit with a door front loading door and simple controls. But, there are microwave ovens that don’t have a door, they slide out like a drawer! These appliances give a designer plenty of options when they want to create their perfect kitchen. A microwave drawer can be installed in a wall space, a kitchen island, or other locations. This can save valuable countertop space for food prep and the cooking progress can be monitored without removing the dish from the microwave. Another efficient option is a wall oven/microwave combo unit that gives you two great cooking options in one appliance.

If you need a microwave or other kitchen appliances for your home check out our online selection or ask one of our advisors for expert advice.

5 Good Reasons to Consider Black Appliances for Your Kitchen

Let’s face it, we’ve been conditioned to restrict our choices to white as the default color for kitchen appliances. But, when you’re considering an upgrade, you may be surprised at the choices of styles, finishes, and colors that are available. This is particularly true when you look at black appliance colors for their aesthetic appeal and other reasons. In this article, we will look at five good reasons for choosing a black appliance for your kitchen.

1.  Easier Cleaning

A traditional stainless-steel appliance finish is harder to clean because fingerprints are inevitably left behind on the surfaces. Frequent polishing is often required to keep stainless-steel finished looking clean and fresh. White appliances tend to show prominent dirt and grime and they need to be wiped regularly. Black appliance surfaces are more forgiving, they don’t tend to smudge and they can be washed quickly with warm soapy water and a microfiber cloth. There is no need to use abrasive cleaning products or scouring pads when you clean a black appliance.

2.  Timeless Aesthetic Appeal

In our opinion, black kitchen appliances look great and they add a great deal of aesthetic appeal to any size kitchen. But, the appeal is timeless because black is a neutral color that blends well with most decor choices. If you really want your new kitchen design to last for a long time, it’s a good idea to choose high quality black appliances. This is a great way to future proof your new kitchen and add value to a property. This can be a great advantage if you’re planning to sell your home in future and you don’t have a set selling date in mind.

3.  Hiding Minor Imperfections and Stains

The clear blank slate of white colors and the shiny stainless steel surfaces are not ideal when it comes to hiding minor imperfections and stains. Poor quality surfaces can ruin the aesthetic appeal of the entire kitchen and they can be hard to identify. A black appliance surface can hide many imperfections, including smudges, smears, splatters, water spots, dirt, dust, dents, and more. The black surfaces prevent these negative aspects from standing out which improves the overall look of the entire kitchen.

4.  Adding Contrast to Existing Appliances

A black kitchen appliance will suit most kitchen design choices because the surfaces are sophisticated and understated. This is particularly true if you choose a matte black finish for your kitchen appliances. They can blend in when you need them to and even stand out if you want to show off a high-end coffee maker or other kitchen elements. When these understated finishes are placed in proximity with brighter colors, they accentuate those tones.

5.  Warming Up Spartan Spaces

Let’s face it, too many inches of stainless steel surfaces can make a kitchen feel cold and spartan. This may be a desirable trait in a working kitchen at your favorite restaurant, but a home kitchen should feel warm and welcoming. Black appliances have a softer character that pairs well with many modern and traditional accents easily. Many materials, such as bare brick, wood, aged metals, stone, and more look great with black appliances. Most people would agree that larger cooking appliances, dishwashers, and refrigerators are the least attractive elements in their kitchens. Changing these appliances to a matte black color will set them apart and add an element of sophistication. They are easy to clean and they don’t attract smudges and fingerprints like stainless steel surfaces.

If you need to upgrade your appliances, you can browse our online collection or speak to one of our kitchen appliance specialists.

The Best Way to Load and Unload Your New Dishwasher

Purchasing a dishwasher is a great way to make our lives easier and tackling dirty dishes in this way even saves water and energy. A dishwasher is a hard working appliance, but it won’t work efficiently if it’s loaded and unloaded incorrectly. Most people have their own techniques, but they don’t tend to think about them too much. In this article, we will look at the best way to load and unload the dishwasher to get the best out of the appliance.

Loading the Dishwasher

Let’s cover the best way to load the dishwasher starting with the top and then the bottom rack:

Start at the Top Rack

When you load the dishes, it’s better to start the loading at the top rack. The dishware should be placed in a strategic and organized way to get the best cleaning results. The glasses, cups, smaller bowls, and other smaller items should be located in the top rack. But, avoid overcrowding or the items may need to go through a second cycle which is inefficient. When items are placed too close together, the risk of breakage increases, and the flow of detergent and water around them is minimized. Always leave space around each item during loading and place dishwasher-safe plastics in the top rack only. This keeps them away from the heating element at the base of the appliance that can cause warping.

Move to the Bottom Rack

When the top rack is filled it’s time to move to the bottom rack where you should place the heavier items, including larger bowls, plates, pans, cooking pots, and other items. All aluminum and stainless-steel cookware should be placed on the bottom rack. But, any china, wood, bronze, or brass materials need handwashing to protect the surfaces from damage and discoloration. Dishwasher-safe plastic items that are too large to fit in the top rack should be placed at the back and sides. This will offer some protection against warping and the larger flat surfaces will not block the water spray.

Utensils and Silverware

Both racks are not filled and it’s time to load the utensils and silverware. These smaller items go in the utensil basket, but there are a couple of tricks that can boost the cleaning performance. It may seem like a good idea to put all the spoons together, but they tend to stick together and the cleaning power is diminished. It’s a better idea to mix the utensils up in the compartments to prevent nesting. All forks and spoons can be placed handle down, but for safety, it’s important to place knives in a handle up position. Grabbing a blade when you’re unloading the basket can cause a serious injury. Don’t wash silver and stainless steel utensils next to each other because a chemical reaction can dent the silver items.

Unloading the Dishwasher

Let’s cover the best way to unload the dishwasher starting with the bottom and then the top rack:

Start with the Bottom Rack

The water that collects on the surfaces of the items in the top rack can spill onto the items in the bottom rack if you unload the top rack first. So, it’s a better idea to unload the bottom rack first. Start with the larger items, give them a quick dry with a clean towel, if they still feel a little wet. Then take the utensil basket out and unload the items.

Move onto the Top Rack

The top rack is where you’re likely to find the items that are covered in water droplets. These are usually the plastic items and the items that are located in close proximity. Have a clean dish towel handy when you unload the top rack to finish off the drying process. Putting the items away as you unload can be a great time saver.

If you need to upgrade your dishwasher, you can browse our online collection or speak to one of our home appliance specialists.

Should You Upgrade to an Induction Range?

A good range is an asset in any kitchen, but one new technology you may not have considered is an induction range. Induction technology is relatively new, but it already has a reputation for excellent energy efficiency and cooking performance. An induction range is easy to use and considerably more energy efficient compared to its electric counterpart. If you’re still unsure, here we’ll examine this type of product in more detail, so you can make an informed decision for your next range upgrade.

How Induction Cooking Works

Induction uses electric currents to heat pots and pans directly through magnetic induction. Rather than using the thermal conduction needed for gas or electric elements to transfer heat, induction heats the cooking vessel itself.

In simple terms, an electric current passes through coiled copper wire under the cook surface to create a magnetic current through the cooking pan, which produces heat. Since induction does not require an outside heat source, only the element that is being used will become warm. There is very little energy lost, as all the heat is transferred to the pan.

The Pros and Cons of Induction

There are both advantages and disadvantages of induction compared to gas or electric ranges. It is important to be aware of both the pros and cons, so you can make an informed decision.

The Pros:

  • Faster Cooking: Since induction can create instant heat inside your pots and pans, it is highly efficient. In fact, you can boil water up to 50% faster compared to using an electric cooktop.
  • Precise Control: Induction also allows you to control the heat more precisely compared to both electric and gas cooktops. With better temperature control and consistent heat, you can reduce the risk of under or overcooking.
  • Easy Clean: Induction cooktops have a smooth surface that resembles a modern electric cooktop. The key difference is that almost immediately after use, the cooktop will be cool enough to wipe away any mess. This means that any spills do not have a chance to bake on to the surface or solidify.
  • Burners that Auto Size: Since induction heats using electromagnetic currents, many induction models have auto sizing. This is a form of pan detection that ensures that heat is only placed where it is needed. So, you don’t need to worry about wasting energy by having a small pot on a large burner.

The Cons:

  • Higher Initial Cost: Induction ranges tend to be more expensive than their gas or electric alternatives. Additionally, there are only certain types of pots and pans that are compatible with this type of cooktop. So, in addition to investing in a new range, you may need to upgrade your cookware.
  • Learning Curve: When you start using an induction cooktop, you will need to be prepared for a learning curve. Many of the standard cooking techniques will not work with induction, so you will need to take some time to learn how to use the surface. The heating times are far faster, so you will need to be ready with your ingredients or you’ll risk burned food.

Other Features of Induction Ranges

In addition to an efficient cooktop, induction ranges can offer some other great features. Many induction range models feature highly efficient convection ovens with self cleaning functions. There may also be a quick preheat function, so you can get cooking and baking with no delay.

If you’re considering upgrading your range, induction ranges are a great option. If you would like to explore the options, browse our online induction range collection or speak to one of our home appliance specialists for further help and guidance.

Should You Move a Fridge On Its Side?

Most refrigerator models are quite bulky, so when it comes time to move one, you may wonder if it is safe to move a fridge on its side. So, here we’ll explore this topic in more detail, so you can plan your appliance move.

What Happens If You Put a Fridge On Its Side?

The main reason why many professional movers avoid putting a fridge on its side is that there are some effects that result from this action. When a fridge is laid horizontal, the compressor oil can move around into the coolant lines, potentially clogging them.

Some manufacturers specifically warn that you should not move certain models of fridge on their side under any circumstances. For example, there may be compressor brackets that can be placed under lateral strain if there is any sideways movement.

Before you start moving your fridge, you should check if the model is suited to be moved on its side. There are some models that should never be placed horizontally including French door, compact, and bottom freezers.

Other Issues With Laying A Fridge On Its Side

Another reason why laying a fridge down can be a bad idea is the shelves. Even if you’ve removed all of the food items, most refrigerator shelves are made of glass, which may break due to shifting. The shelves are designed to slide out easily, but there is still space for them to bounce and crack if you lower the fridge into a horizontal position.

You may also create problems with the refrigerator doors. Refrigerator doors have a slight vacuum seal, but this will not prevent the doors from opening during moving.

Turning On A Fridge That’s Been On Its Side

If your manufacturer has stated that it is possible to lay your fridge horizontally, you will still need to take care before turning it on. You should avoid plugging it in immediately or you could risk damage to the compressor.

Place your fridge upright and leave it unplugged for at least the same amount of time it was horizontal. So, if it was on its side for three hours, stand it upright and unplugged for three hours. If your fridge was delivered on its side, assume it has been horizontal for a day, so allow a full 24 hours before you plug it in.

Tips for Moving a Refrigerator

If you want to properly move your fridge, there are some tips to save yourself potential problems, whether you move it standing up or on its side.

  • Unplug Overnight: It is a good idea to turn off the refrigerator and unplug it the night before you plan on moving it. Leaving it overnight will allow sufficient time for the appliance to defrost, but if you are struggling for time, two or three hours may suffice. Bear in mind that if you have any food you want to keep, you should find an alternative way to keep it cool before you start this step.
  • Remove the Shelves and Drawers: The shelves and drawers can be mostly glass, which could be damaged if there is any shifting. So, it is a good idea to remove them before you tape the fridge doors shut. This will not only protect the shelving, but also the interior and doors, which could be damaged by sharp glass fragments.
  • Keep it Fresh: If your fridge will be closed for more than a day, try putting a box of baking soda inside. This will help to absorb any odors.

If your fridge is past its best and not worth moving, consider an upgrade. You can explore your options with our online collection or speak to one of our home appliance specialists for further help.


What is the Future for Kitchens in the Covid Era?

There is no way to avoid the fact that Covid-19 and its variants have had a huge effect on many aspects of our lives during the past 12-18 months. Some changes have been more immediate and obvious than others and we have had to adjust how we approach tasks, use space, and more. In many homes, the kitchen is firmly at the heart of things, this is where we cook, eat and socialize and this space can provide some insights into our lives. In this article, we will take a closer look at how kitchens have changed in 2021 and what we can expect as this Covid era continues for the foreseeable future.

Choosing Smarter Kitchen Appliances

Even before the Covid-19 pandemic arrived on the scene, we were seeing a movement towards the increased use of smart technology in many areas of our homes. Of course, this also includes the kitchen and smart appliances are becoming a popular option. Some common applications of smart kitchen technology include toasting, steaming, frying, baking, air fryers, microwave ovens, and more. Smart appliances have touch screens for easier control or you can use a dedicated app in certain circumstances. If you’re forced to work from home, it can be hard to get the work/life balance right and smart technology can take some of the strain during this difficult period.

Adopting Smart Shopping and Storage Strategies

When times are hard people tend to tighten their purse strings and adopt budgeting strategies to make their household budget stretch further. One of the areas where a lot of savings can be made is the food budget and food waste is a real problem. If you use smart shopping options and smart storage to track your food needs, consumption and ordering, you will notice that food waste is reduced significantly. Color coding your pantry, making extra space, and even adding a second freezer or refrigerator can help. If you want to store more food for longer, learning how to can foods or starting a dry food pantry can really make a difference. When you have ample supplies of flour, you can make regular use of your oven or bread maker to ensure you always have fresh bread.

Kitchen Remodeling on a Budget

When the purse strings are tightened, it’s easy to think that every project must go on hold indefinitely. But, it is possible to make smaller changes with a DIY ethos and improve your home in many ways without spending large amounts of money. This is equally true in the kitchen, you may not be able to swing new cabinets, but a lick of paint can give you a fresh new look. Skimping on a much needed appliance upgrade doesn’t make much sense when you can get better performance and improved energy efficiency. Shop for greener appliances with an Energy Star rating and make energy efficiency your focus for the next few years.

Entertaining at Home

As people are shying away from going out, it seems like a natural trend towards entertaining at home is underway. The Covid era may include dinner parties for family and close friends in an intimate setting at home. This may explain the increase that we’ve seen in bolder kitchens with designated areas for home dining. Open shelving, breakfast nooks, kitchen islands, elaborate cooker hoods, and more have become popular items in recent months. When you entertain at home, you may need to consider an upgrade to your existing kitchen appliances with a focus on energy efficiency improvements.

If you want to upgrade your kitchen appliances, explore our collection online or speak to one of our appliance specialists for expert advice and guidance.