
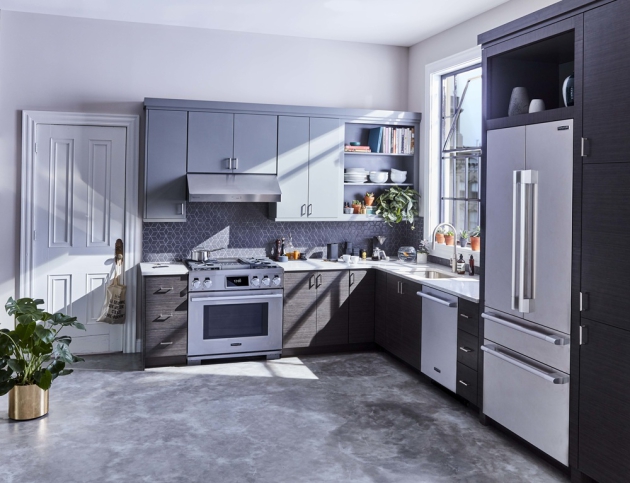
When looking for luxury cooking appliances, homeowners might add an appliance garage design for hidden kitchen storage, strict countertop clearance metrics, and specialized cabinetry electrical layouts. While integrating an appliance garage, homeowners should keep in mind that poor planning for appliance garages can lead to component overheating or door binding.
A true appliance garage goes beyond a simple storage solution. It needs to be designed as a functional cabinet system. This includes considering the precise movement of the doors, depth of usable space, appliance height, location of outlets, and space for air and heat control.
In luxury kitchens, countertop appliances such as coffee systems, mixers, grinders, compact ovens, and warming appliances need clear access and safe operating space. Good cabinet design conceals appliances when not in use while protecting the panels, hinges, tracks, stone surfaces, and the surrounding millwork.
Mechanics of Concealment: Door Style Kinematics
The function of an appliance garage design involves more than simply the built-in kitchen aesthetics of the cabinet. Different door mechanisms use different strategies for the interior cabinet space, which in turn impacts storage space, the accessibility of appliances, and the overall functionality of the hidden kitchen storage. Below are some of the variants and design principles to keep in mind.
Pocket Door Systems
Pocket doors are side-mounted doors that slide backward and disappear into wall pockets. While the door creates a large opening, the hardware that holds the track reduces the usable interior width and requires additional cabinet depth for the concealed door panels.
Tambour Roll-Up Doors
Tambour doors move up and roll into a compact coil above the cabinet opening. This design provides a full-width access opening, but the rolling mechanism requires sacrificing some space in the cabinet’s upper region.
Lift-Up Canopy Systems
Lift-up canopy doors open upwards using hinged arms or gas-assisted lift mechanisms mounted to the cabinet sides. Because the hardware is mounted inside the walls of the cabinet, its full width is available. However, overhead space is required for the swing path.
Different concealment systems offer varying usable volumes within the cabinet carcass. The right mechanism requires a careful balance of factors such as the movement of the doors, the storage space, the size of the appliances, and the accessibility of the space in the cabinet before the construction of the cabinetry.
Spatial Architecture: Calculating Countertop Clearance Metrics
To ensure unobstructed access to appliances and prevent heat and air circulation issues, proper countertop clearance metrics must be observed. The measurement that countertop clearance impacts most is the distance between the bottom border of the upper cabinet track and the finished countertop surface. Below are the key metrics and aspects.
Finished Countertop Surface as the Base Point
All measurements need to start with the finished solid surface countertop. This is the working plane where the small appliances rest. Therefore, the height of the backsplash, thickness of the slab, trim of the cabinets, and under-cabinet lighting must be included in the final clearance calculation.
Lower Cabinet Tracking and Header Clearance
The lower lip of the upper cabinet tracks first obstructs the space above the appliance. Even if the external cabinet face seems tall enough, pocket door tracks, tambour coil housings, lift arms, and stabilizing rails may still reduce the clear opening.
Required Vertical Appliance Clearance
High-end kitchen tools sometimes require additional height for proper placement because cabinet hardware, header framing, and ventilation space reduce the true opening. To determine a proper height, start from the top of the cabinets. Then check tracks, outlet depth, and steam clearance to assist in the construction process. The following specifications will help you confirm the tracks, outlet depth, and steam clearance.
- Standard Backsplash Height: 18″ Clearance from finished stone counter to bottom of standard upper wall cabinet
- Pocket Door Track Runback: Requires 2.5″ to 3″ of interior cabinet box depth lost to tracking hardware channels
- Premium Small Appliance Suite: Demands up to 16.5″ to 17.5″ net vertical height to allow steam ventilation clear of the header
This planning avoids appliances scraping the header and trapping heat in cabinet panels, as well as providing adequate space for the user to safely operate, clean, and service the appliances without damaging the cabinetry.
Power Infrastructure: Designing Cabinetry Electrical Layouts
A luxury cooking appliance garage requires more than a basic concealed outlet. Good cabinetry electrical layouts need to take into account the appliance’s power needs, GFCI protection, space for plugs, heat, and door openings, and should allow easy access to outlets for resetting, checking, and servicing.
Internal Power Sourcing
Appliances like coffee makers, kettles, compact ovens, and warmers are often placed in dedicated enclosures. These appliances can draw heavy power when the heating elements are activated. To avoid power stability issues, a dedicated 120V, 20A branch circuit is often specified to keep power delivery stable.
High-Draw Circuit Planning
An appliance garage should be an active workspace, not a passive storage space. If an espresso machine, kettle, or even a compact oven is all in the same garage, having a separate electrical circuit for each appliance prevents circuit overload, unnecessary tripping of circuit breakers, and stress on countertop circuits.
Code and Safety Coordination
Before starting electric work, it is imperative to have it reviewed to ensure compliance with the National Electrical Code Regulations, as well as local inspection regulations. A licensed electrician must conduct an inspection prior to confirming GFCI protection, as well as the spacing and sizing of receptacles and circuits and shutoff controls, as these factors impact safety and function before cabinet fabrication, appliance placement, and final wiring approval.
Technical Specifications Matrix: Clearance & Mechanism Tolerances
| Enclosure System | Interior Box Depth Loss | Vertical Header Space Loss | Practical Application Limits | Best Suited For |
| Vertical Tambour Roll-Up | 0.5 Inches (Back wall tracking tracks) | 4.5 to 6.0 Inches (Required for top cylinder coil housing) | Restricts tall accessories near the header; leaves interior wide open | Tight corner spaces, shallow cabinet depths, retrofits |
| Horizontal Pocket Track | 2.5 to 3.5 Inches (Per side wall pocket housing) | 0.5 Inches (Top stabilization rail mechanism) | Decreases net internal opening width; requires structural side walls | Wide custom enclosures, multi-bay setups, hidden coffee bars |
| Bi-Fold Lift-Up Door | 0.0 Inches (Mechanism mounts on walls) | 2.0 to 3.5 Inches (Arm articulation swing radius) | Needs clear overhead space outside the box during open state | Modern minimalist wall panels, continuous linear upper runs |
To get exact measurements for appliances, be sure to measure them with any plugs attached. Depending on the model, a plug’s head can take up 1 to 2 inches of space, potentially requiring additional clearance at the back of the appliance. This could also affect whether the appliance sits flush against the cabinet.
The finish carpenter must accommodate scribe strips, panel thickness, reveal gaps, and service access. A clean front face does not matter if the appliance cannot be removed without damaging the millwork.
Frequently Asked Questions
Is a dedicated GFCI outlet required inside an enclosed appliance garage?
Enclosed appliance garages for tools that draw a lot of power and can be dangerous near water, steam, and metal often require a GFCI outlet. You should consult your local code and a licensed electrician for your specific situation.
Can you safely operate an enclosed toaster oven inside a cabinet?
You should not store your toaster oven in a closed cabinet unless the company that manufactured it specifically allows this type of use. Without the proper design of an airflow system or automatic shutoff, your toaster oven could also cause damage to cabinet hardware and finishes.
How deep should an appliance garage box be fabricated to sit flush with a kitchen island?
To have an appliance garage that aligns with a kitchen island, the box needs an interior depth of about 21″ – 24″. The box’s depth must also consider the appliance’s size, the outlet’s location, and the hardware and panel alignment.
Thermal Mitigations and Automated Safety Safeguards
The risk of damage is severe when heat-trapping appliances are placed inside closed cabinets. Toaster ovens, ovens, kettles, warming tools, and coffee systems all can trap heat inside the cabinet box and cause damage to cabinetry, wiring, and cabinet hardware.
Heat Containment Risks
Never treat an appliance garage as a completely sealed unit. If heat can’t escape, the garage and its appliances can be damaged. Without a way for heat to escape, the finishes on the outside can become discolored, the veneer can separate, and the panels can warp. Internally, there can be electrical problems with the receptacles and cords.
Door-Linked Power Shutoff
Automated terminal limit switches provide an additional safety feature. These switches can be mounted directly to the hinge of the cabinet door. When the door closes, the switch cuts the electrical current to the internal outlets.
Protection for Cabinetry and Finishes
Automated terminal limit switches increase safety. Connected to a cabinet door hinge, they cut electrical current to the internal outlets when the door is closed. This shutoff design prevents appliances from running when the cabinet is closed. It protects surrounding built-in kitchen aesthetics and finishes, prevents surface and heat distortion, and reduces fire danger.
Professional Installation Requirement
Limit switches, relays, outlet controls, and shutoff devices should be planned by a licensed electrician and designed prior to cabinet construction. The system should be designed for the appliance load and installed without compromising cabinet hinges, tracks, plugs, or service access.
Engineer Your Custom Architectural Kitchen Layout with Universal Appliance and Kitchen Center
A high-quality appliance garage depends on careful measurement, proper mechanism selection, safe power and heat management, and fine-tuned design elements. The design should be approved prior to any major work, including fabrication, stone templating, or electrical installation.
At Universal Appliance and Kitchen Center, we provide help to homeowners, designers, builders, and architects in assessing premium kitchen planning with a focus on appliance integration, clearances, and ventilation. This is especially important when planning for luxury cooking appliances, custom panels, compact culinary workstations, integrated refrigeration, coffee systems, and specialty cooking tools.
Before finalizing the kitchen design, homeowners should visit the Universal Appliance and Kitchen Center product galleries or schedule a consultation with one of our specialized field technicians. The right process and planning protect your cabinetry and hardware investment and keep the finished kitchen clean, safe, and easy to use.