
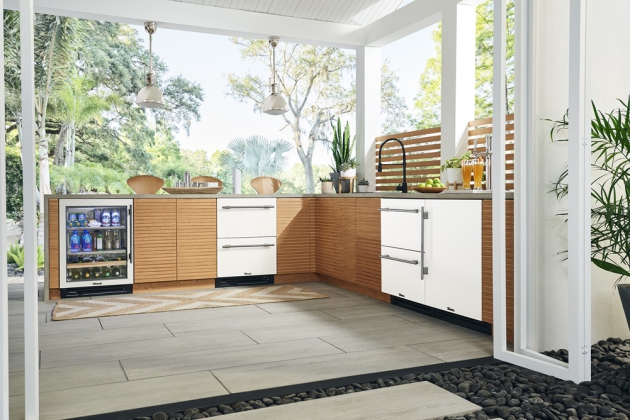
When evaluating luxury cooking appliances and exterior entertaining spaces, planning outdoor kitchen infrastructure is typically driven by precise utility rough-in tolerances, total gas line volume demands, and specific island ventilation codes. Inadequate site preparation results in expensive masonry demolition or dangerous fuel pockets.
The shift toward high-performance outdoor living requires more than just a patio. It demands a sophisticated engineering approach to site preparation. Homeowners and contractors must treat the outdoor kitchen island as a primary utility hub. This hub serves as the intersection of high-voltage power, high-BTU fuel sources, and sanitary drainage.
Precision in the early phases of construction is not optional. A variance of just two inches in a utility stub-out can render a pre-fabricated masonry island unusable. This guide explores the critical technical requirements for preparing a site that is safe, compliant, and durable.
The Utility Rough In Zone: Mapping the Footprint Before the Pour
The success of your project starts under the concrete. You must define a precise “rough-in window” within the island’s footprint. This is a localized cutout where all conduits emerge from the ground.
Precision is mandatory here. If your stub-outs are off by just a few inches, they may hit a structural stud or an appliance housing. Most contractors use a 12-inch by 12-inch square for this purpose.
This centralized hub simplifies the connection process. It keeps your outdoor kitchen infrastructure organized and easy to access. Proper utility rough-in tolerances allow for slight adjustments during the final masonry phase.
Always check your island’s orientation before the concrete truck arrives. A mistake in the layout leads to core drilling later. Core drilling is expensive, loud, and weakens the slab.
Keep your conduits clustered tightly together. Leave enough vertical height to clear the base of the cabinet. Use a template to hold pipes in place during the pour. This prevents “pipe creep” as the heavy wet concrete settles.
Gas Flow Hydraulics: Sizing Lines for Massive BTU Demands
High-performance outdoor cooking requires massive amounts of energy. A professional-grade built-in outdoor grill can consume more fuel than a standard indoor range. You must calculate the total load of all appliances before selecting your pipe diameter. Failure to do so leads to “pressure sag,” where flames flicker or extinguish when multiple burners are lit.
Natural gas extensions require different considerations than liquid propane drops. Natural gas is delivered at lower pressures. Therefore, longer runs require larger pipe diameters to maintain flow. You must account for every elbow and tee in the plumbing run. Each fitting adds “equivalent length” to the total distance calculation.
Use the following process to determine your outdoor gas line sizing:
[Total Appliance BTU Load] —> Sum of all components (e.g., 42″ Grill at 75,000 BTUs + Side Burner at 30,000 BTUs = 105,000 BTUs)
[Distance Run Calculation] —> Linear footage from the main residential meter to the outdoor island termination point
[Pipe Diameter Selection] —> Determines required outdoor gas line sizing to completely eliminate fuel pressure sag
Upgrading to a ¾ inch or 1 inch main supply pipe is often a necessity for luxury builds. If you are running a line 100 feet or more, a ½ inch pipe will likely fail to support a large grill and a pizza oven simultaneously. Always consult a licensed plumber to verify the local pressure delivery from your utility provider.
Thermodynamic Safeguards: Low and High Venting in Enclosed Structures
Safety is the most important part of masonry construction. Enclosed islands can trap escaped gas, creating a literal bomb. Proper masonry island venting is not optional. It is a code requirement.
The placement of your vents depends on the type of fuel you use. Natural gas is lighter than air. It rises. Therefore, vents must be placed within the top 6 inches of the island walls.
Liquid propane is heavier than air. It behaves like water and pools at the floor level. For these systems, vents must be placed at the very base of the structure. Without floor-level venting, a small leak can fill the entire base of the island with explosive gas.
Cross ventilation is the gold standard. Place vents on opposite sides of the island to encourage airflow. This prevents heat buildup and protects the electronics in your built-in outdoor grills. Stagnant hot air can melt wire harnesses and ruin high-end ignition systems.
Technical Specifications Matrix: Rough In and Utility Clearances
The following data provides the quantitative benchmarks for your build. These measurements align with standard building codes and official Wolf technical design specifications.
| Utility Classification | Required Conduit Configuration | Absolute Dimensional Tolerance | Structural Safety Isolation Rule |
| High Voltage Electrical | Schedule 40 PVC or liquid tight flexible metallic conduit | Sits a minimum of 12 inches clear of all wet waste plumbing paths | Must feature independent GFCI breaker protection at the main panels |
| Natural/Propane Gas | Black iron pipe or approved CSST flexible tracking lines | ±1/2±1/2 Inch variance at the appliance connection manifold | Mandates a dedicated mechanical shutoff valve accessible via an access panel |
| Sanitary Waste Line | Schedule 40 ABS drain line with structural downward slope | ¼ Inch of downward drop per linear foot of horizontal run | Must route beneath local frost lines to prevent seasonal ice fracture |
FAQs
Why do liquid propane outdoor kitchens require venting grids at the base of the island?
Liquid propane is significantly heavier than the surrounding air. If a leak occurs, the gas will settle at the lowest possible point within the enclosed cabinet. Venting grids at the base allow this heavy gas to escape the island rather than forming an explosive pocket.
Can electrical conduits and gas lines run through the exact same cabinet opening?
Yes, they can emerge in the same rough window, but they must maintain physical separation. Code usually requires at least 6 to 12 inches of clearance between gas manifolds and electrical outlets. This minimizes the risk of a spark igniting a minor gas leak.
What electrical circuit size is needed to power an outdoor kitchen island with refrigeration?
Most islands require at least one dedicated 20-amp GFCI circuit to handle the combined load of rotisserie motors, LED lighting, and refrigerators. If you are adding high-draw items like a power burner or an electric warming drawer, a second dedicated circuit is highly recommended.
Civil Compliance: Weatherproofing, GFCI Shields, and Inspection Gates
Electrical safety in an outdoor environment is non-negotiable. The combination of high voltage power and proximity to water creates significant risk. All external receptacles must be Weather Resistant (WR) rated. These components are designed to withstand humidity and temperature fluctuations without corroding.
Furthermore, every outlet must be protected by a GFCI (Ground Fault Circuit Interrupter). This device shuts off power in milliseconds if it detects a leak to the ground. You must also use “in use” covers. These heavy-duty plastic or metal shields allow a cord to remain plugged in while the cover is fully closed. This maintains a watertight seal even during a rainstorm.
Following official Wolf technical design specifications is also vital for warranty protection. Most luxury brands require specific clearances from combustible materials. If your island uses wood framing, you must install a stainless steel insulating jacket for the grill. Failure to pass a pre-pour inspection can lead to costly fines. It may even require you to jackhammer your new patio to fix a buried utility error.
Advanced Structural Considerations for Heavy Islands
When planning your outdoor kitchen infrastructure, you must consider the weight of the finish materials. A masonry island finished with natural stone and a 3cm granite countertop can weigh several thousand pounds. Standard 4-inch concrete patios may crack under this concentrated load.
Engineers often recommend thickening the slab to 6 or 8 inches directly beneath the island. Adding rebar reinforcement in a grid pattern prevents shifting. If the island shifts even half an inch, it can put stress on your gas and water connections. This stress leads to leaks that are difficult to detect behind stone veneers.
Proper drainage around the base of the island is also essential. You should grade the patio with a 1% to 2% slope away from the house and the kitchen hub. This ensures that water does not pool at the base of your cabinets. Standing water can corrode the bottom of stainless steel appliances and degrade masonry mortar over time.
Winterization and Plumbing Longevity
Plumbing for an outdoor kitchen requires a strategy for seasonal changes. In cold climates, you must be able to drain the system completely. This is why a “stop and waste” valve is installed inside the main house. This allows you to shut off the water and drain the exterior lines to prevent freezing.
When routing your water lines, avoid 90-degree elbows where water can become trapped. Using PEX tubing is often preferred for outdoor runs. PEX has a slight elasticity that allows it to expand if a small amount of water freezes. However, the best practice remains a full seasonal blowout using compressed air.
For waste lines, the slope is the most important factor. As noted in our specifications matrix, a 1/4-inch drop per foot is the standard. If your patio is level, you may need to trench deeper to maintain this slope. Without it, food waste and water will sit in the pipe, causing odors and blockages.
Engineer Your Custom Outdoor Kitchen Hub with UAKC
Building an outdoor masterpiece requires aesthetic vision and mechanical precision. Do not leave your utility planning to chance. The complexity of modern luxury cooking appliances demands professional oversight.
At UAKC, we specialize in bridging the gap between architectural vision and mechanical reality. We provide the technical data you need to ensure your utilities align perfectly with your chosen appliances.
Before you lay your first line of pipe or pour a single yard of concrete, consult with our specialized architectural appliance estimators. Visit a local UAKC showroom today to verify your structural blueprints and explore the latest in high-performance outdoor technology. Let us help you build a space that is as safe as it is beautiful.